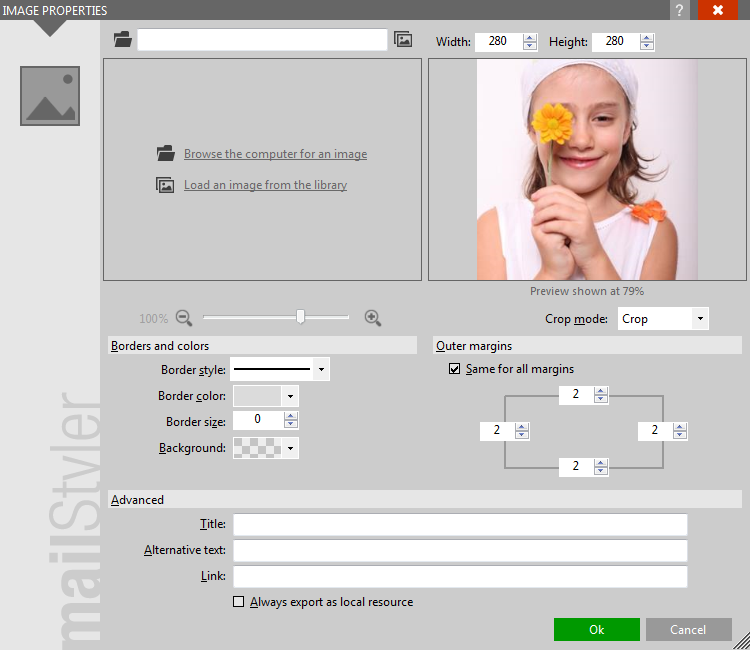
Double click an image to edit its appearance, the Image properties form is displayed.
| The image properties form |
|
| Click to enlarge |
Unlike other editor forms in MailStyler, the image properties form can be enlarged by dragging the lower-right corner of the window.
The upper-left area of the form enables you to select the image you want to display.
Select an image by browsing your computer's folders or choose one from MailStyler's Image Library.
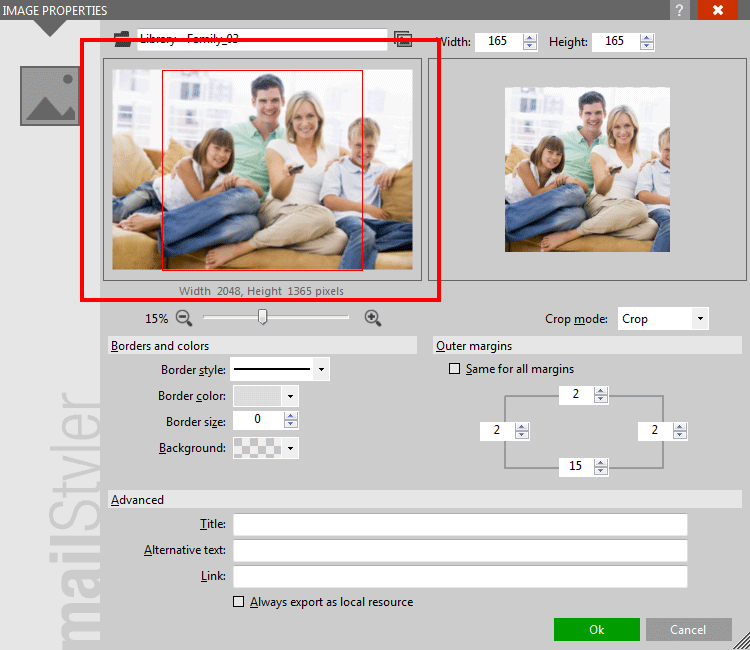
| A source image after selection |
|
| Click to enlarge |
After selection, the left panel shows you the selected image, in its original aspect.
You can zoom in and out the original image by acting on the Zoom slider, placed right below the source image.
When Crop mode is set to Crop, a red inner rectangle is shown inside the source image showing the area that will be displayed as a result of the crop, based on the current image size. See Crop mode below.
| The crop rectangle |
|
| Click to enlarge |
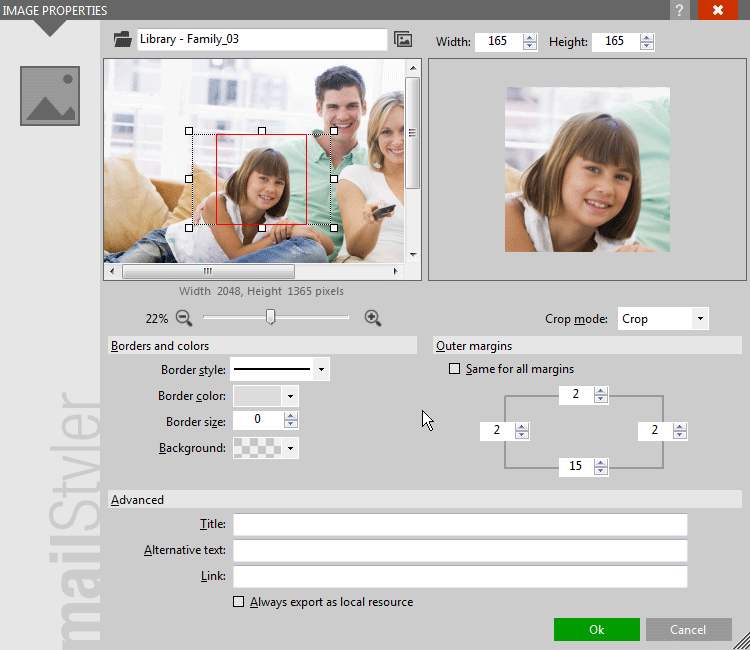
- Click inside the selected area to move the selection.
- Click the anchors around the selection to change its size.
- Click anywhere outside the selected area to remove the selection.
| Selecting a detail |
|
| Click to enlarge |
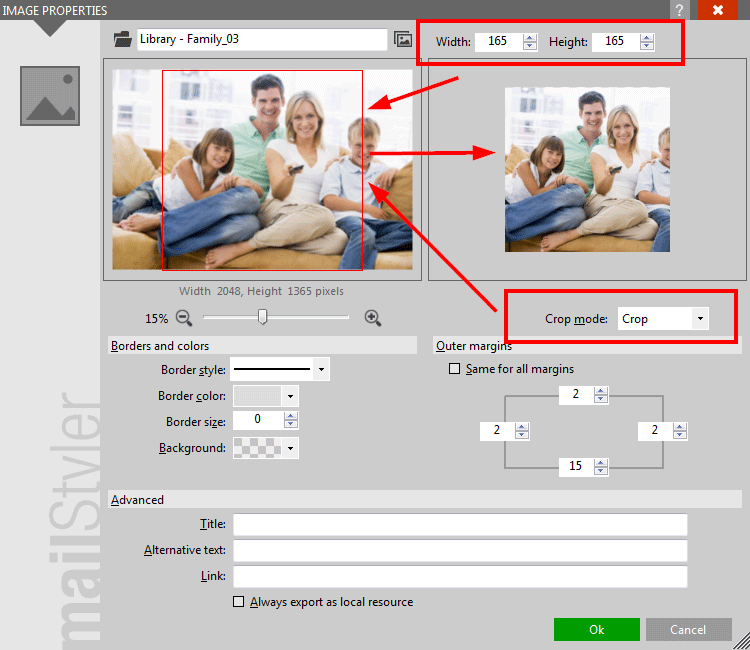
The right panel shows you a preview of the image as it will be displayed in the newsletter.
Set its size by acting on the Width and Height controls placed right above it.
Keep in mind that the image preview in the right panel may be shown reduced in size, depending on the available space on the form. A small label will indicate the zoom ratio.
CROP MODE
The Crop mode combo box enables you to define the way the source image is fitted into the destination area.
Regardless of whether your source image is an entire image or a detail, the destination image will be resized to match the size defined in the Width and Height controls:
- Crop mode = Crop: The source image is cropped horizontally or vertically to best fit into the destination rectangle.
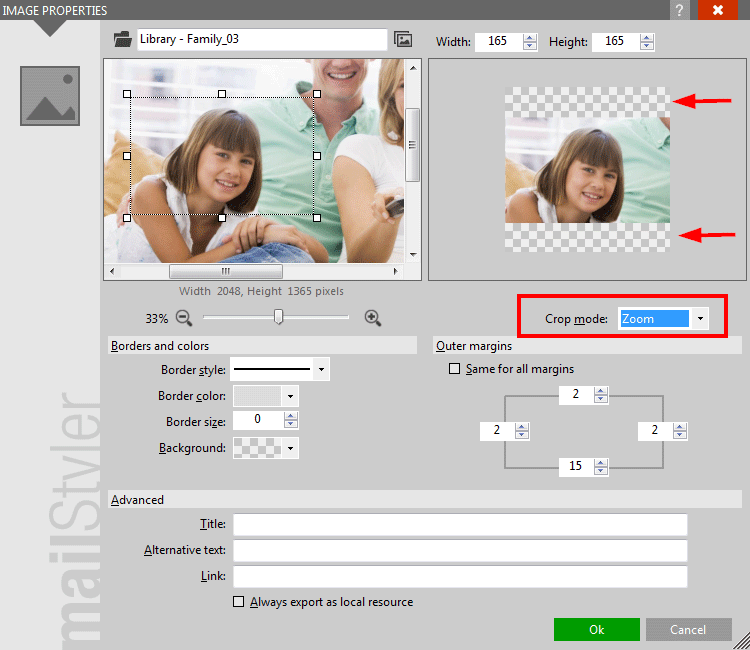
- Crop mode = Zoom: The source image is shrunk or enlarged to fit entirely into the destination rectangle. Vertical or horizontal transparent areas will be added to ensure that the aspect ratio is preserved.
| Crop mode zoom adding transparent stripes |
|
| Click to enlarge |
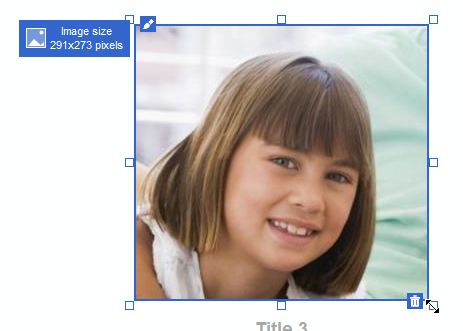
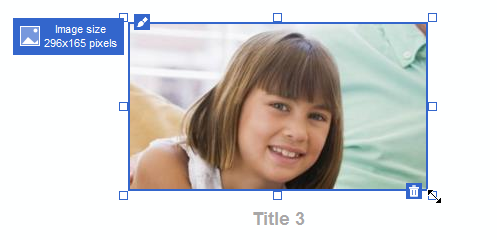
Keep in mind that images can also be resized directly from the newsletter body by dragging one of the anchor points displayed when the image is selected.
During resize and according to the resize setting defined in the global preferences, the crop mode will define how the image is resized, on the fly.
| The image anchor points | The image after a resize with auto-crop |
|
|
| Click to enlarge | |
The lower area of the form displays the controls that enable you to define additional settings:
- Borders: Define border color, border style and border width.
- Background color: The background color is shown only in transparent areas.
- Outer margins: Margins between the image object and its surroundings.
- Title: It's the text displayed when the mouse hovers over the image in a browser.
- Alternative text: It's the text displayed in a browser in case the image cannot be displayed.
- Link: enter a URL here if you want the image to be a link to an external resource.
- Always export as local resource: Activate this check box to override the destination of this image during Cloud Exports (Full version only).
When you export a newsletter and choose MailStyler's free cloud service as image destination, you can still decide to save each single image independently as local resource, by activating this option.
For html exports, this will result in having the image exported in a linked folder, while for eml exports, this will result in having the image embedded as a resource directly in the eml file.
See also
Image library