Every element (blocks, text, images, buttons, and social set) can be customized and saved in libraries.
Select the item you would like to save and click the Save into the library icon in the toolbar; otherwise you can right-click on the item and select the Save into the library command.
Depending on the element a specific window will be open to save the item in the matching library. An image will be saved in the image library, a block in the block library and so on.
| Saving elements in the library |
|
| Click to enlarge |
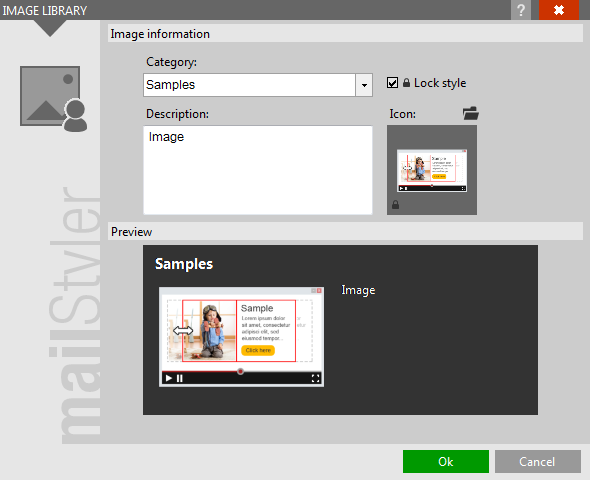
The top of the window indicates in which library the item is going to be saved.
To better organize the contents of the library you can save items in categories.
The categories are listed in a drop down menu. Samples is the name of the default category where you will find the pre-made items available in MailStyler. When created other categories, they will be listed in this dropdown menu.
You can save the item in a category by selecting it from the drop down menu.
Otherwise you can create a new one by typing in the field the name you would like to give to it. The new name will also appear in the preview panel.
In the description field you can enter a text that can better identify the saved item. Also this one will be reported into the preview panel.
The saved item is identified in the library with an icon created automatically. If you want, you can change it by clicking on it and choosing a file from your computer to replace it.
By selecting Block style, when the item is placed into the work area it does not inherit the newsletter global characteristics, but it keeps those defined when saved.
The preview panel shows the element that is going to be saved along with the category’s name and a description.
Click OK to confirm the saving or Cancel to return to the work area without saving.
See also
Main window
Editing images
Editing buttons
Edit social set
Special characters